If you’ve played Kingdom Come Deliverance you may recognise this sword:
It’s the sword of Sir Radzig Kobyla- who has both the coolest sword and the coolest haircut in the game.
I initially made this model as a mod for the VR game Blade and Sorcery. It took me some time to figure out the best way to make certain elements, like the the wire inlay around the leather grip, and the decorative elements on the pommel. It was modelled in Blender, and textured in Substance Painter and photoshop.
Ultimately I’m pretty happy with how it turned out. You can download from sketchfab here– (non-commercial use obviously)
Now that the game has been out a while- I’m now happy to talk about some of my work on Under Cover.
My title on the project was officially “concept artist”, but I also did a few textures here and there and several in-game 2d and 3d assets.
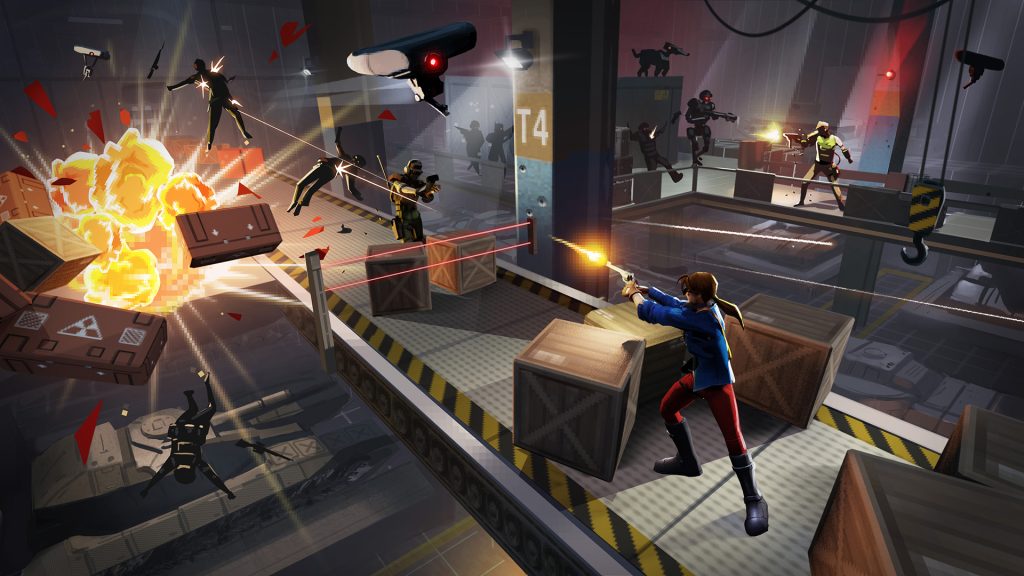
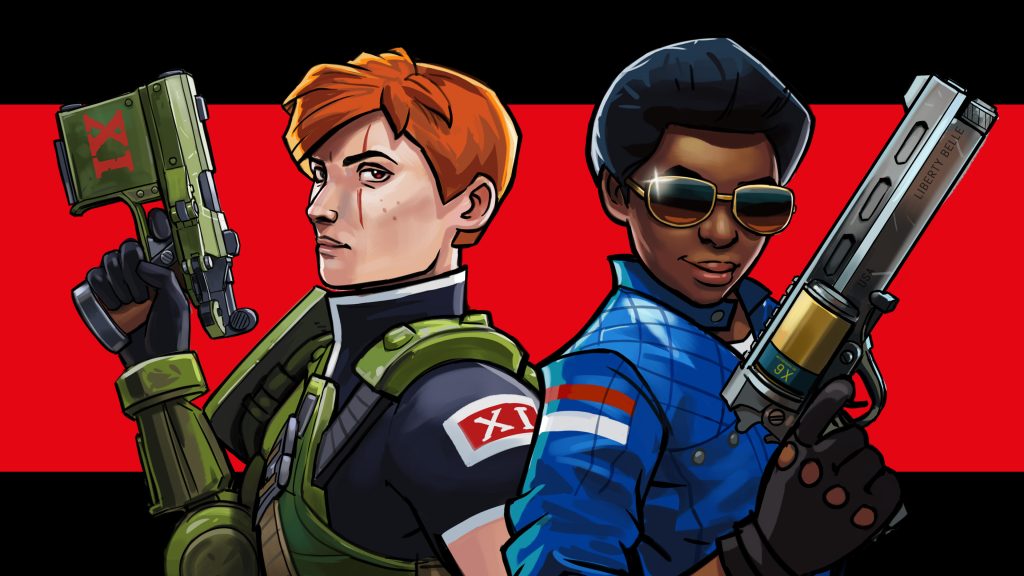
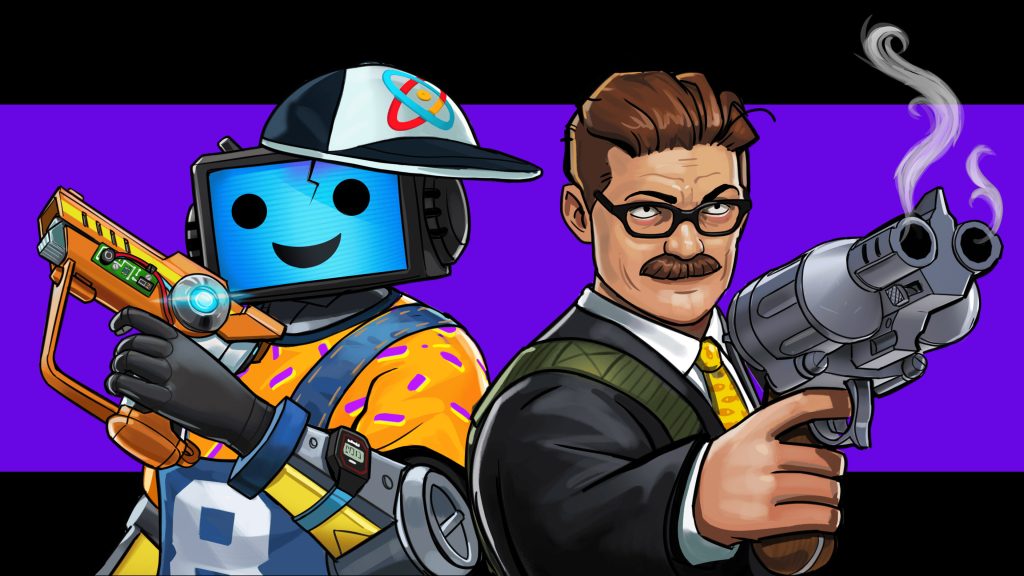
Key art created for the initial pitch for the game that would go on to become Under Cover.
Weapons
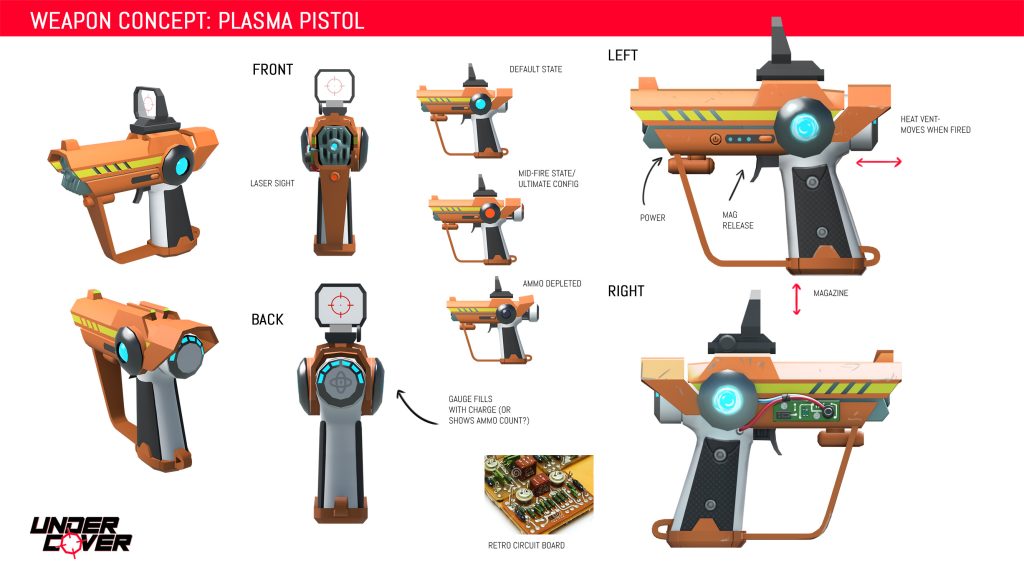
Let’s look at some weapons. Vitally important for a VR shooter! A lot of VR games involving guns have your hands floating weirdly and the gun pivoting all over the place. For us- pistol grip was king- because that one-to-one relation between hand and gun direction is what feels tightest in VR.
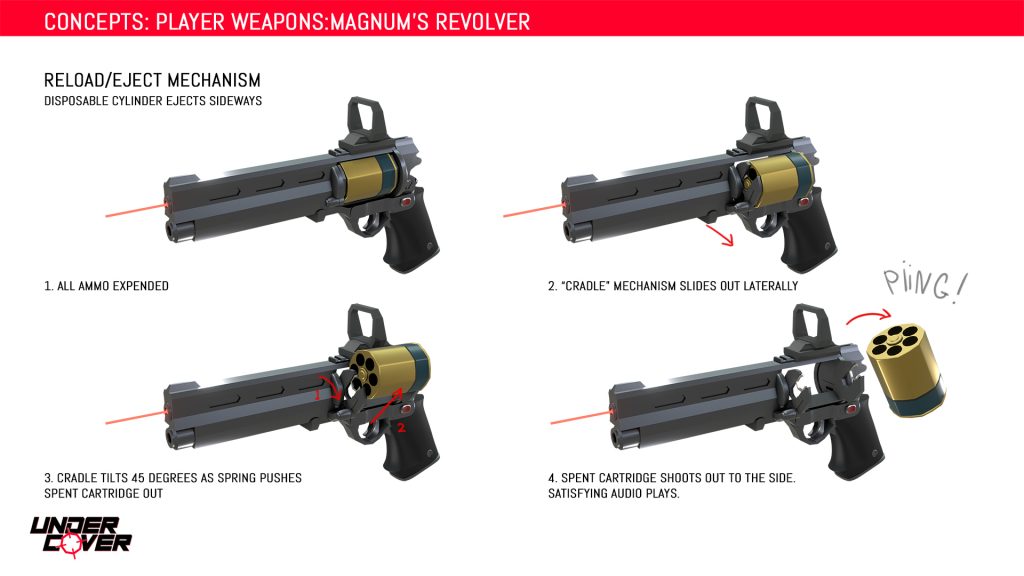
One idea that didn’t make it into the game was to have the entire cylinder of the revolver eject after being emptied of rounds. I was pretty proud of this idea as part of the game’s swipe at the wastefulness of capitalism. It’s only when I went on to play Cyberpunk 2077 that I realised someone had already beaten us there!
All two-handed weapons were therefore designed to have the hands as close together as possible- meaning bullpups usually- in order to mask the fact that really only one hand was controlling the gun direction.
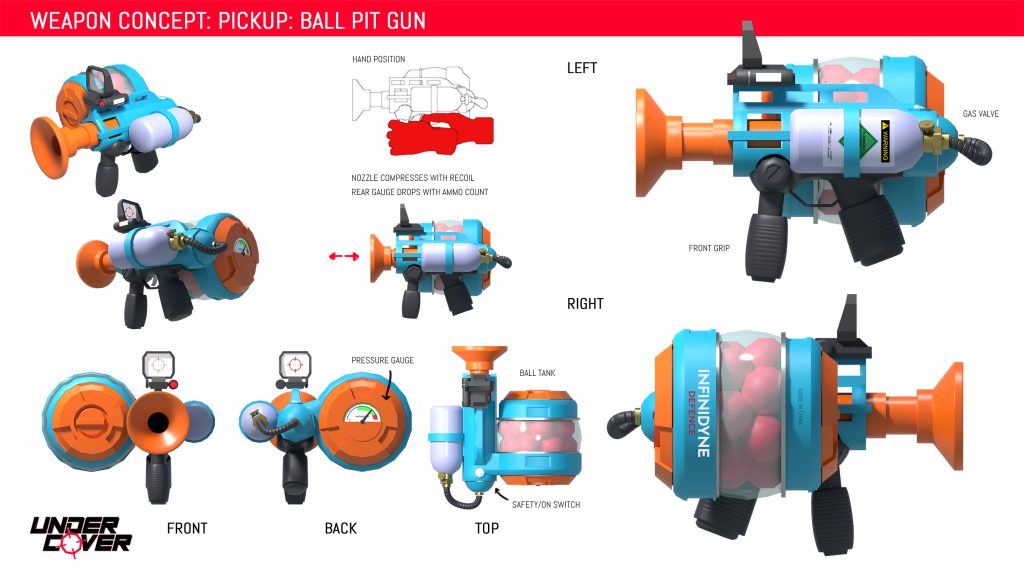
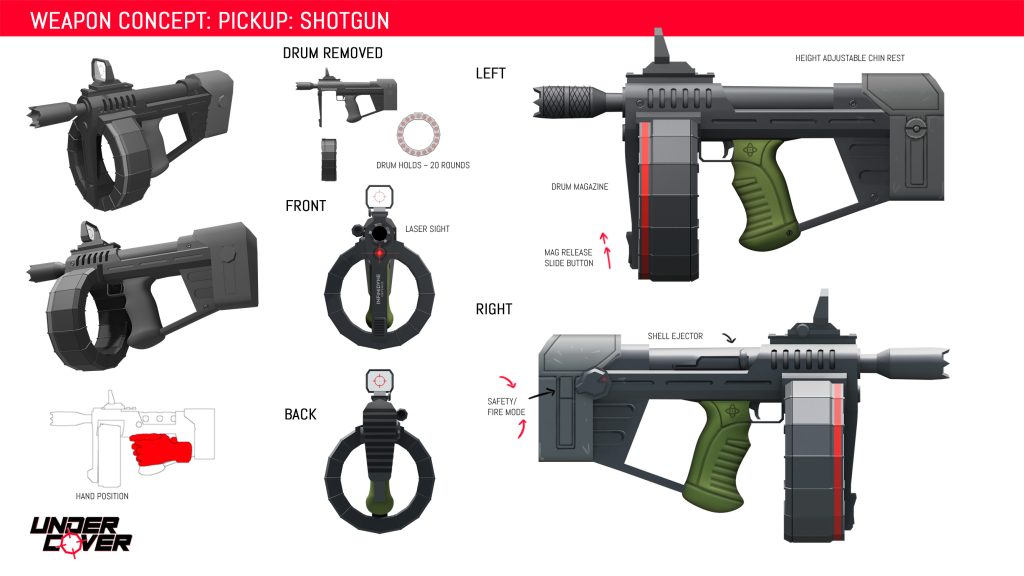
The Ball pit gunThe shotgunThe minigun
The concept process for the guns involved two stages- a rough ideation stage followed by a 3d block out in blender. I like to work this way because besides the fact that it’s fast and easy to tweak- with 3d you can be confident your design looks good from multiple angles. You can also preview the model in VR for an early sense of how the scale translates in VR.
8 Ball’s signature weapon
Most of the decals, logos and stickers were then added to the 2d renders later on in Photoshop.
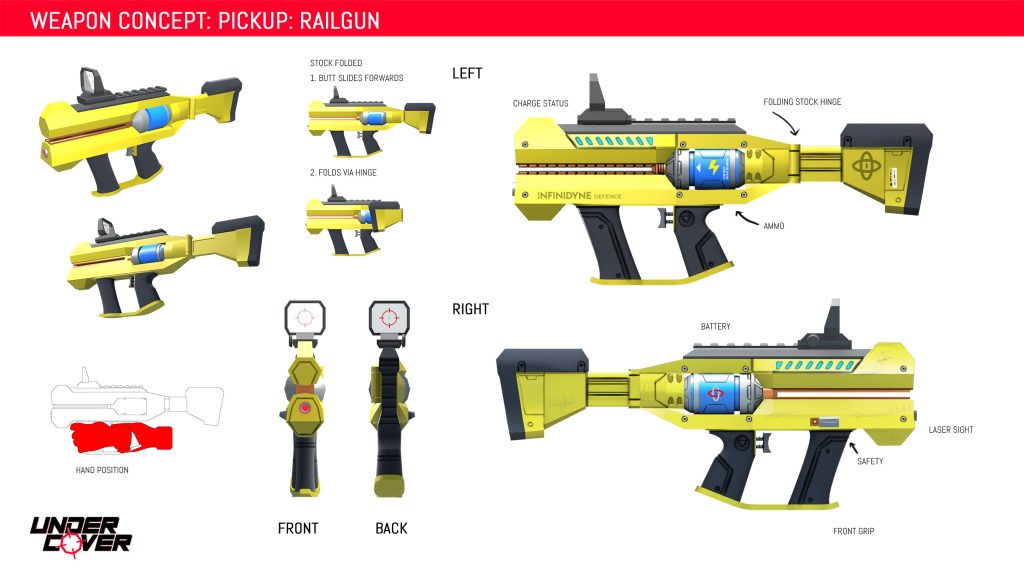
Like any project- particularly with games- not all ideas make it through, and we were forced to drop a few gun ideas I’d love to have seen such as the railgun and the “business crossbow” (It fired pencils).
Characters
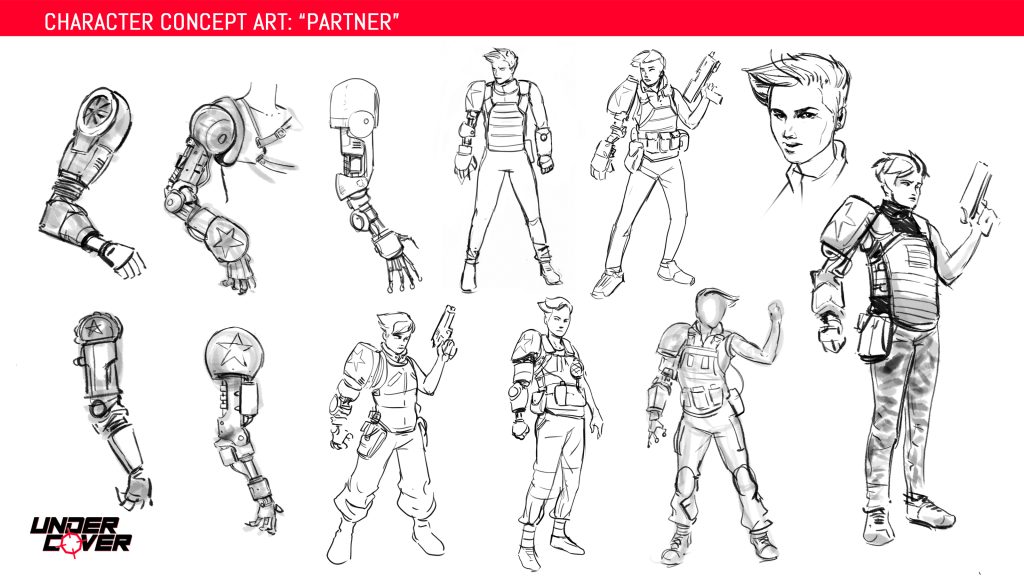
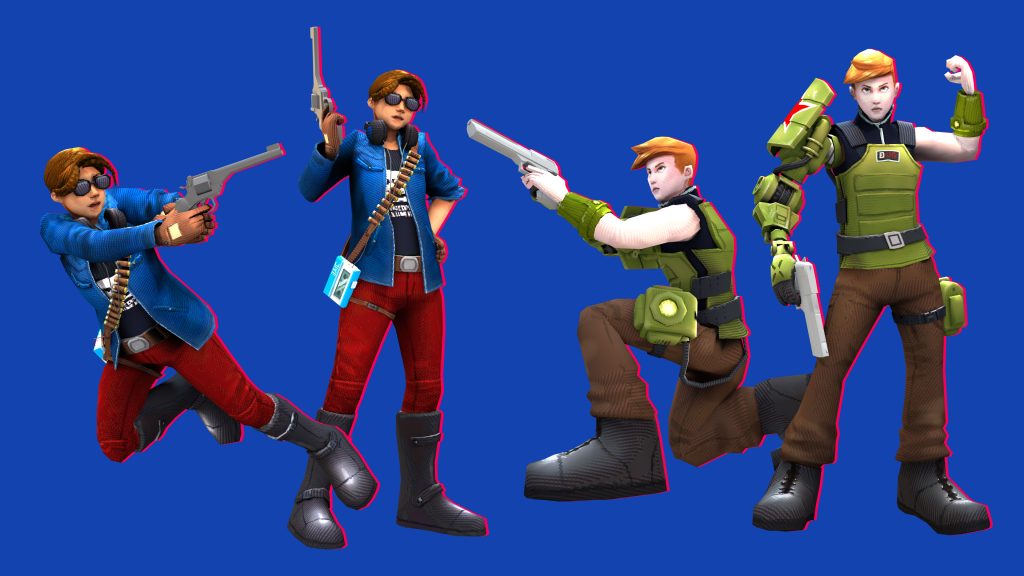
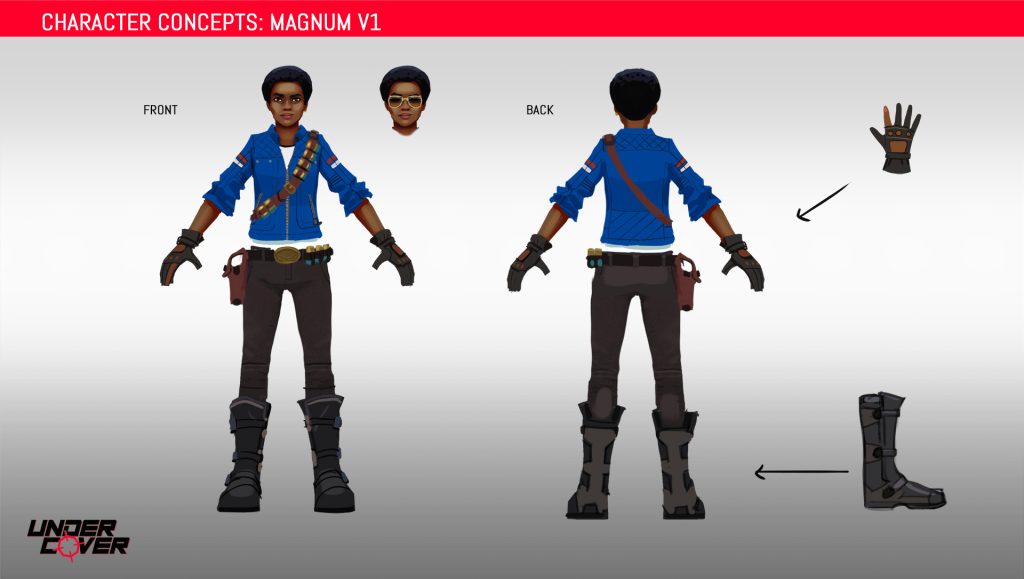
Now for some characters! Red Eye and Magnum- our two heroines- started off quite different to how they eventually ended up. Initially Red Eye was imagined as some kind of calm and collected Soviet super soldier, enhanced with a giant robot arm, while Magnum was imagined as a gung-ho American who shoots first and asks questions later. Because we didn’t have names for them at the time we simply referred to them as Comrade (Magnum) and Partner (Red Eye). This amused me considerably but was a bit confusing as even I had to stop and think about which one was actually which.
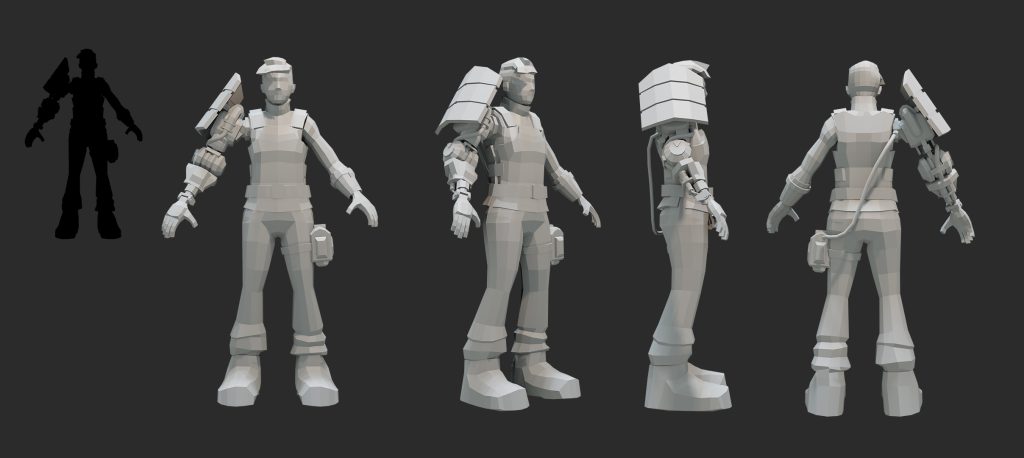
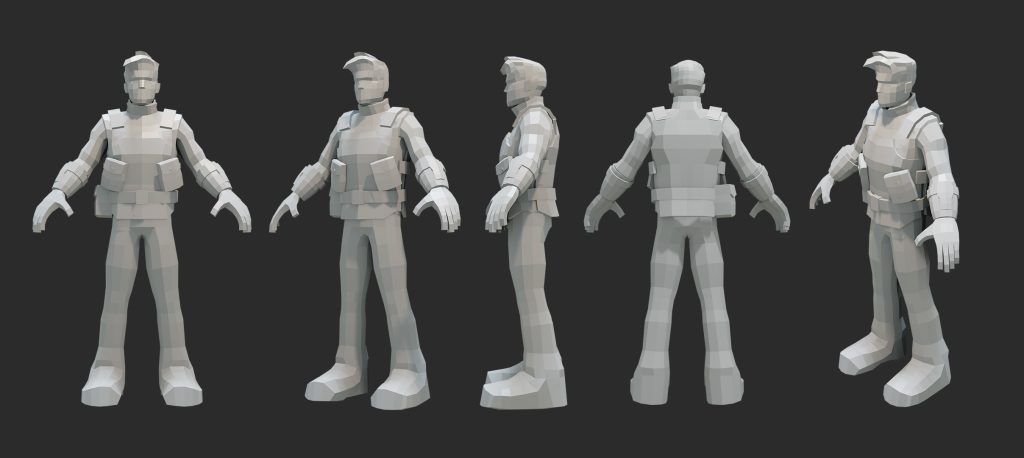
Here’s an early model of Red Eye- the chunky style drew inspiration from games like Timesplitters. We had to lose the pipe to the robot arm because it would be a nightmare for rigging and animation.An early male version of Red EyeThe pre-production characters: Comrade and Partner!
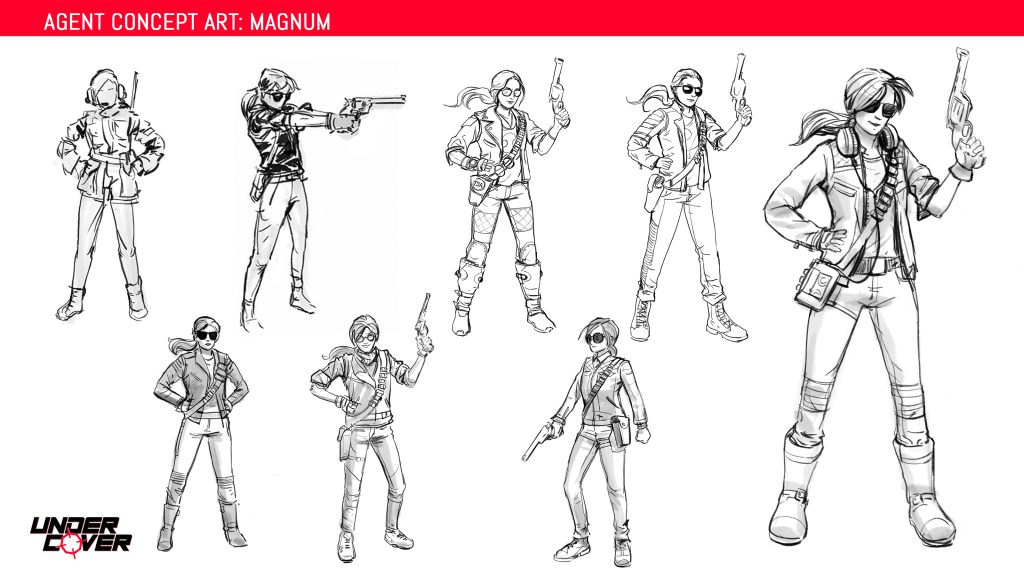
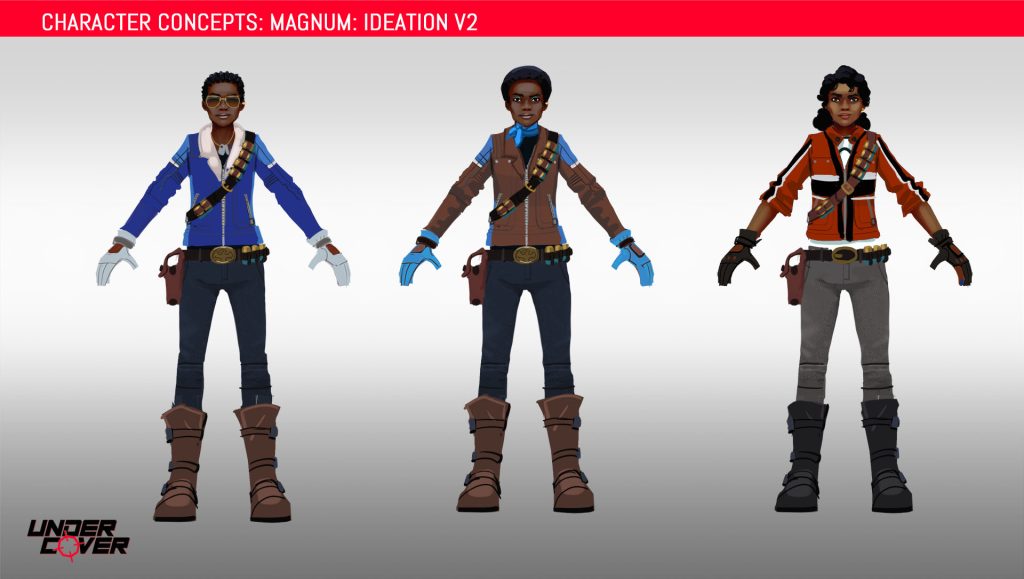
Magnum was primarily inspired by action heroines from 80s and 90s films. She grew from a music-loving pre-production design where she had a Walkman and a set of headphones into a firebrand biker chick. The bandolier was a nod to Metal Gear Solid’s Revolver Ocelot.
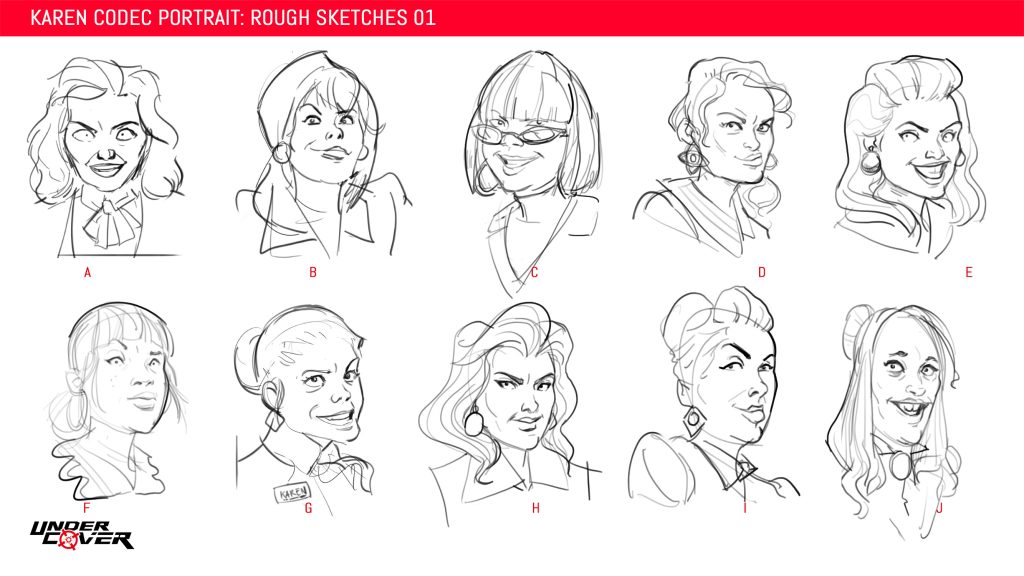
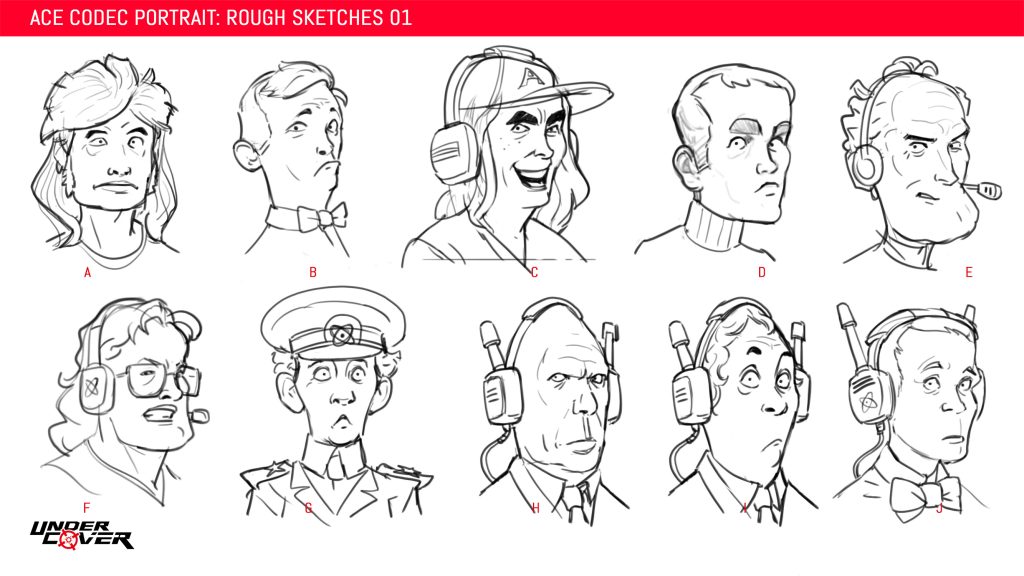
Some ideas for Karen from HR.Ace AKA Jakaal
We also designed a cast of corporate middle managers to form the bosses of each level. They were only going to appear in the codec as headshots so we just needed faces, and since I love drawing faces I relished this task.
The final designs for Red Eye and Magnum
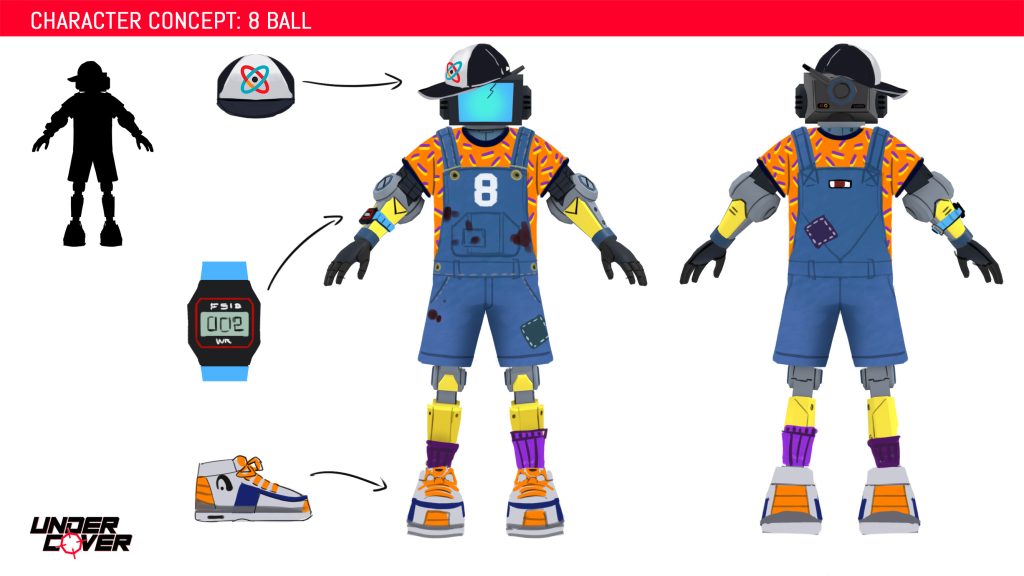
Alongside Red Eye and Magnum where Topman- the overworked Handler and workplace daddy for the protagonists- and 8 Ball- the defective defector and robot agent.
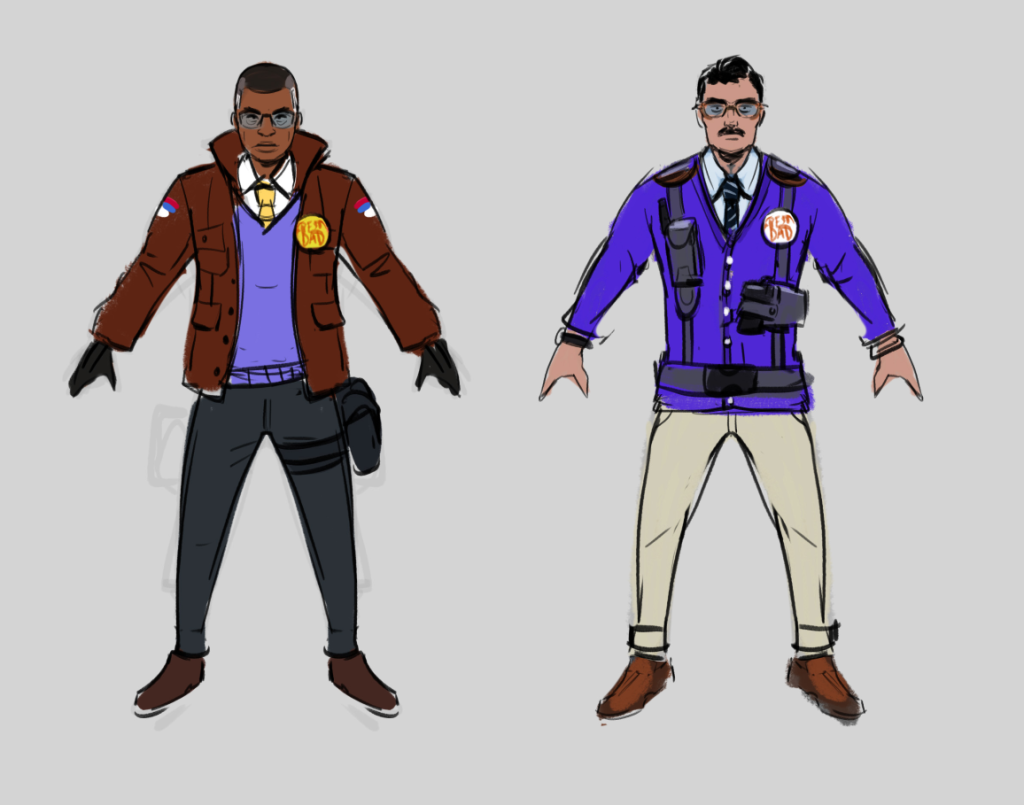
Topman- our secret agent “handler” character- could have been an alien, or inter-dimensional being at one point. He/they would whisk the player away to alternate dimension to complete some gunplay challenge. In this rough concept on the left side you can just see earth in the background of the central drawing.Ideation for Topman- I still wish we’d gone with the idea on the left!8 Ball was intended to be a kind-hearted, childish character in the body of a corporate Murderbot.The final Topman and 8-Ball
Enemies
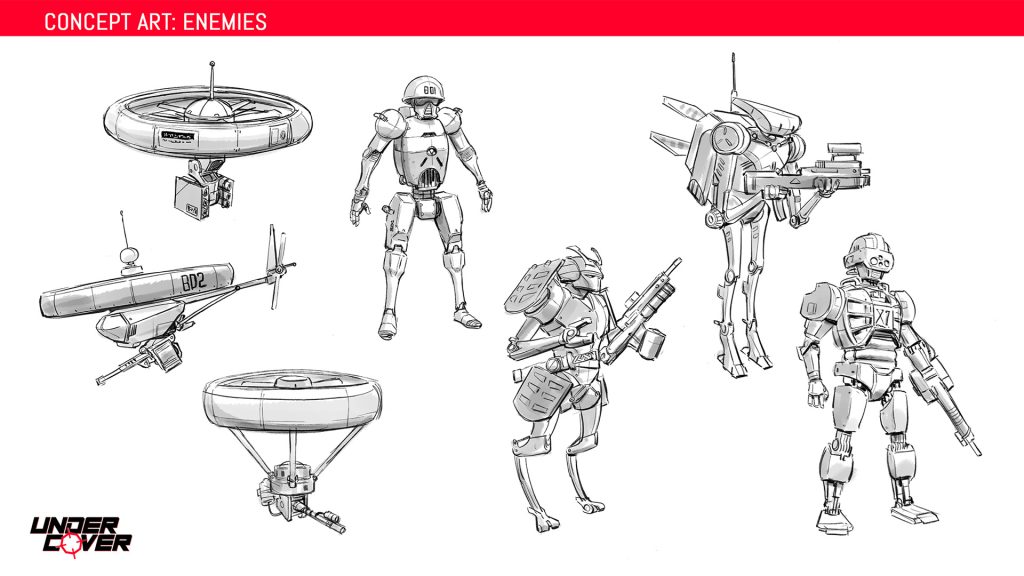
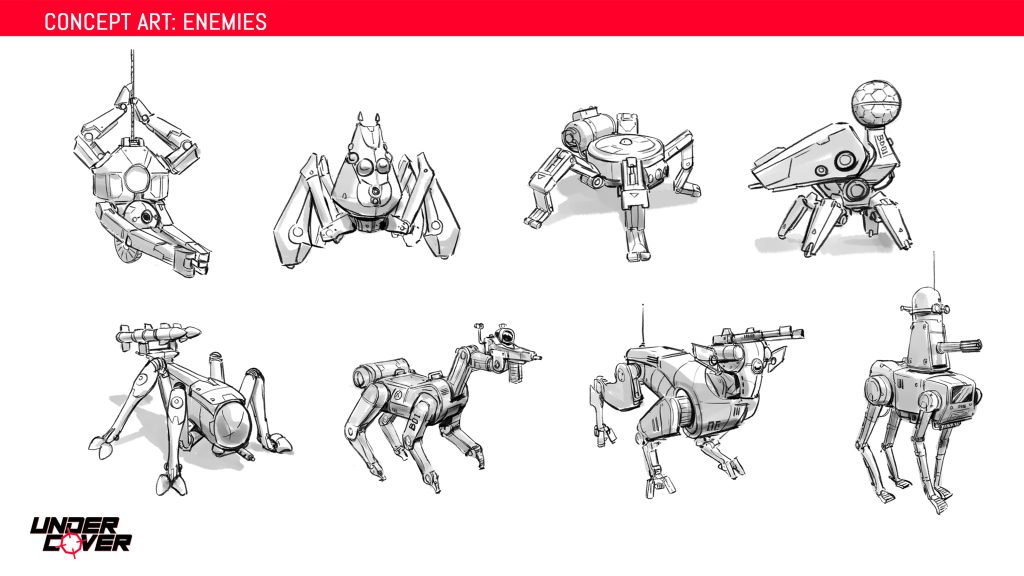
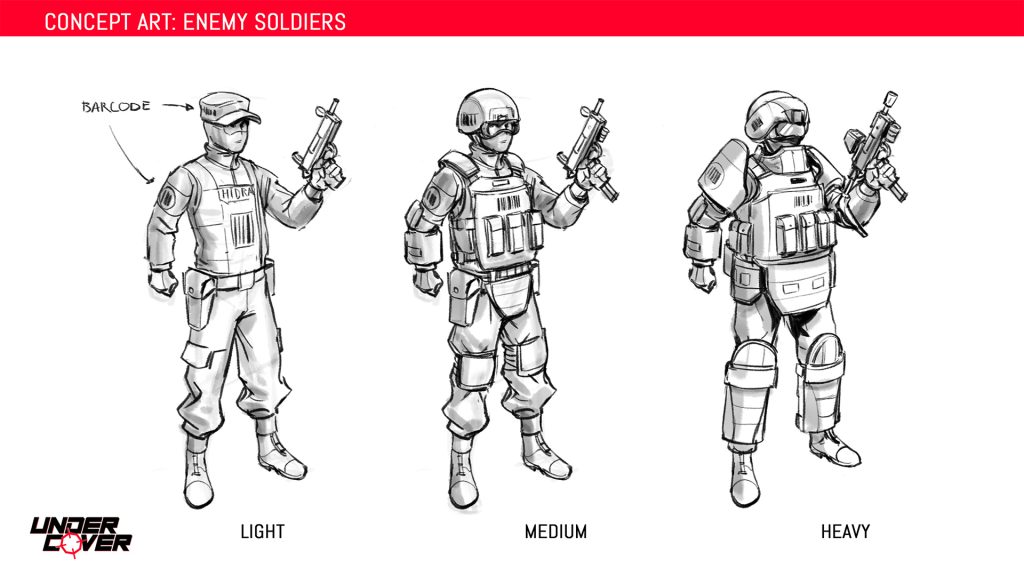
We had a lot of cool ideas for different enemy types early on- drone swarms, abseiling spider bots, and robot dogs with a cannon for a head. Ultimately these all fell victim to the brutal constraints of time and were cut, we focused instead on humanoid characters.
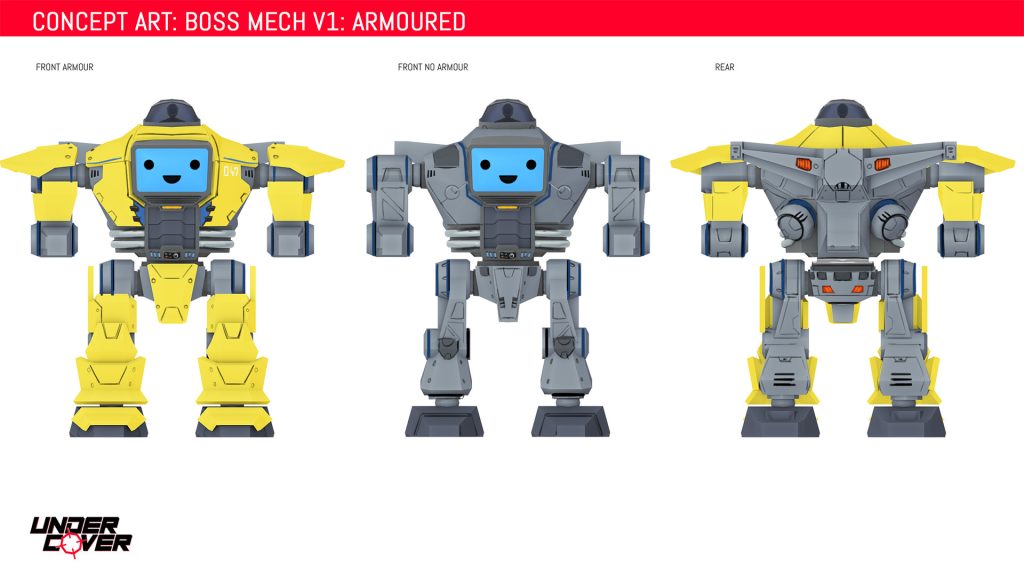
The grunts were to have barcodes on their uniforms- because to their employer they were simply products.Infinidyne’s giant combat mech- each time the player faces a different boss the mech would be back with an additional new weapon to ramp up the difficulty.
Environments
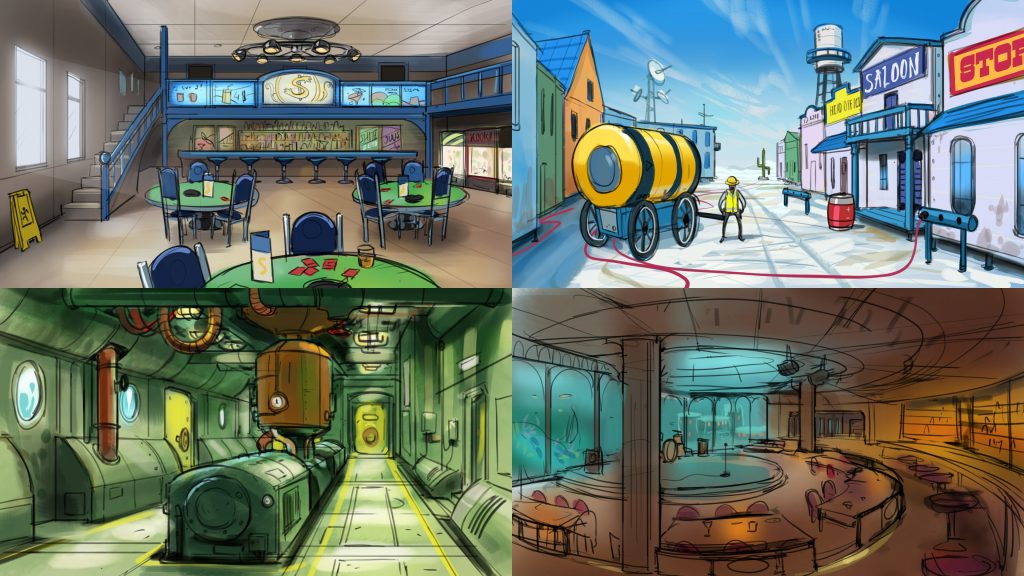
Early environment ideas- a corporate town and a secret underwater base for billionaires.
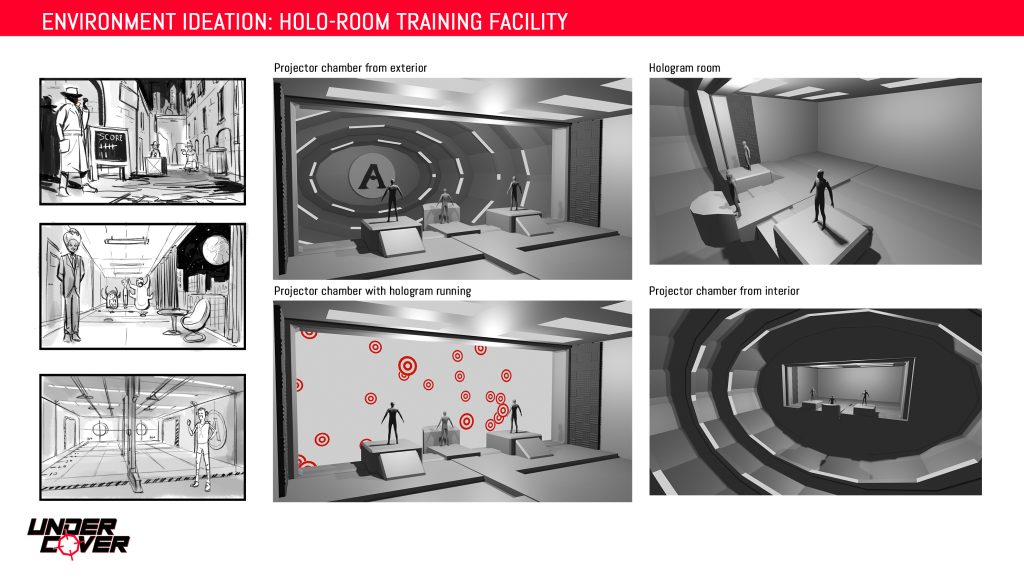
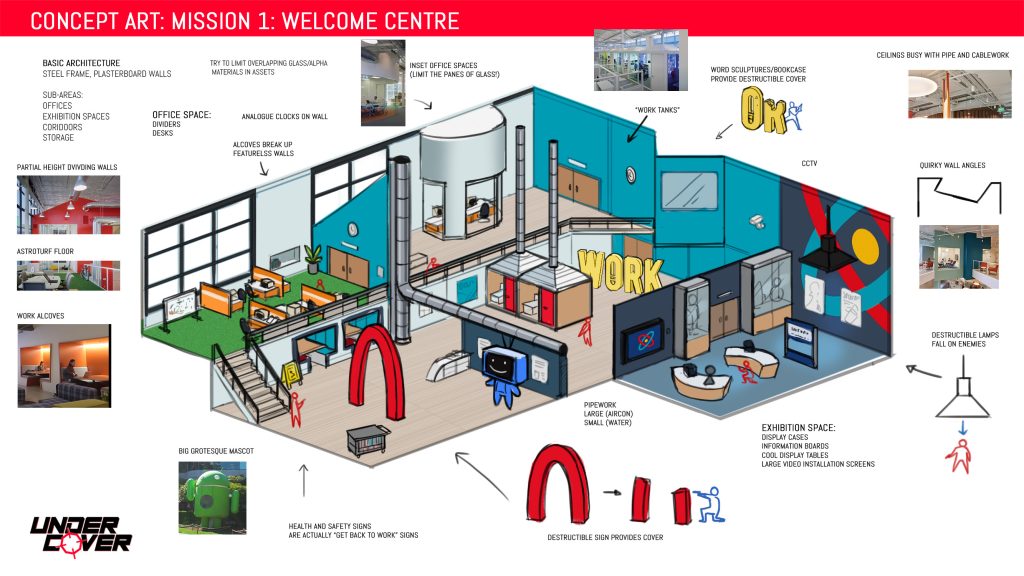
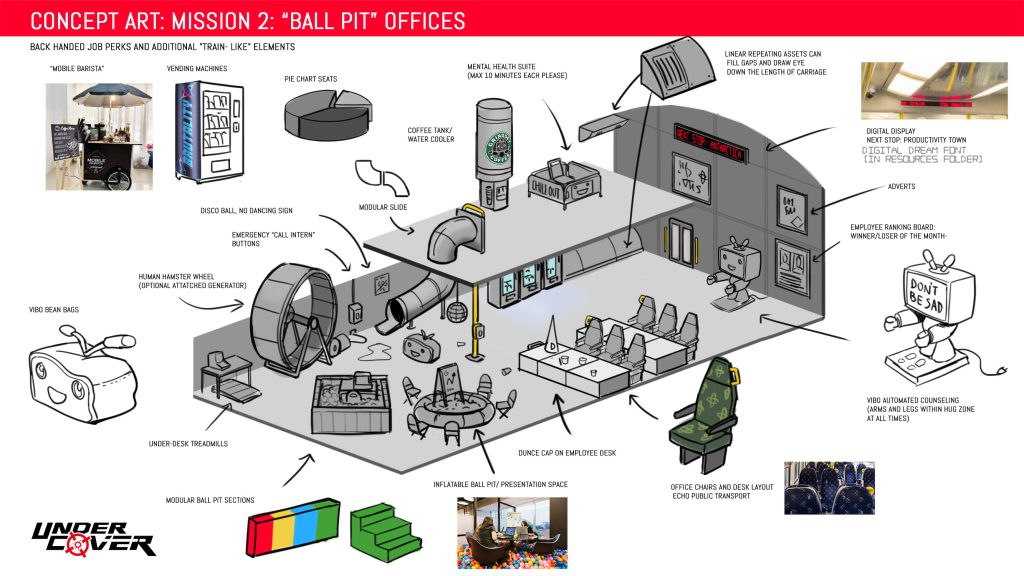
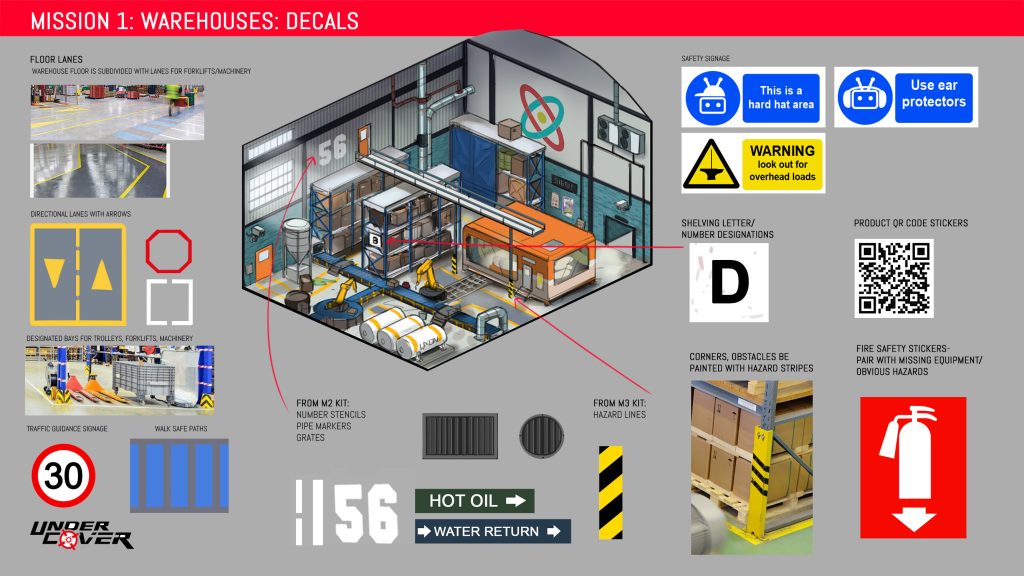
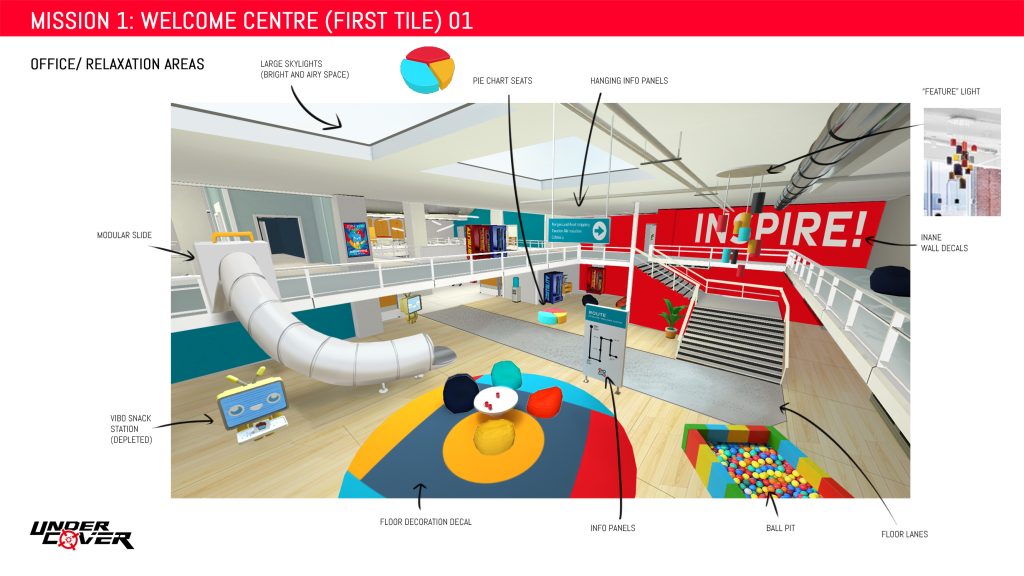
Finally, a few words about the environments. As a small art “department” working on Under Cover- we seemingly decided to set ourselves the biggest challenges we could in pursuit of the most bizarre and madcap environment ideas. No asset packs here! All custom. Where do you even go to get assets for a corporate casino train/ mobile co-working space? I’m pretty certain that every single 3d asset in the game was custom made.
From my perspective as concept artist- one of the hardest parts of creating the environment concepts was simply trying to think up enough waist-high, plausibly bullet proof objects to provide cover for the player! It’s harder than you’d think.
Working on Under Cover was a hell of a learning experience, and I’m very grateful to Gary and Luke over at Sigtrap for the opportunity to work on the game. I can also honestly say that there wasn’t anyone on that team that I didn’t like. Now that the game is in the hands of players I hope that if you’ve played the game and are reading this- that you enjoy it as much as I enjoyed working on it! Cheers.
Barbel- my Overwatch style character design- is finally complete. Two and a half months of focused work has left me with something I’m relatively pleased with. There’s always room to improve though, and one of my favourite ways of doing that is to review the latest project and think of how to get better results next time.
The idea for Barbel was born sometime in early 2017- I knew I wanted to make a 3d character in the style of Overwatch, but I din’t have any specifics beyond that. Then one day, the idea came to me- almost fully formed- which never happens usually and is not be relied upon. I wanted a giant catfish armed with a trident like one of those Roman gladiators. I could see him hunched there in my mind’s eye doing some kind of daft “play of the game” pose and making weird fish noises. He had a space helmet full of water though. I ditched that early on.
What I learned:
In concept art 3d is superior to 2d.
Sketching is obviously a very fast way of presenting ideas, but the fact is that some ideas just don’t occur to you simply because you’re thinking in a 2d way.
When you have a lump of 3d clay and you can quickly manipulate it without preconceptions- you begin to think in a more 3d way and consider how forms twist and turn as they travel through space- how the silhouettes look from all angles rather just one or two key profiles, or how things overlap. All this stuff is obviously possible in 2d- it’s just harder.
It’s also pretty tedious to redraw a character from the back or the side, just so you can see a few areas to decide how they’ll look. In 3d you have one model- and you can see any angle you desire and what’s going to go there. Playing around in Gravity Sketch and Oculus Medium led to a few happy accidents that helped me overcome design challenges I was having at certain points. Which leads me on to my second point…
VR is the best way to concept design in 3d.
Wherever I thought that the 2D concept was underdeveloped or not clear enough I would play around in Medum or Gravity Sketch and quickly come up with a solution. Arguably you could use Zbrush or Maya or something traditional, but the immediacy of reaching out and drawing a line in the air, of genuinely working with three dimensions of input rather than the two offered by the monitor screen, of being completely immersed in a world where only you and your work exist- is pretty damn special! VR may be a little clunky at the moment, but it more than compensates for it by allowing for a state of flow that surpasses traditional modelling.
It’s also really fast. The aforementioned three dimensions of input mean you don’t have to move the camera every time you want to do a simple operation such as moving an object along an axis that isn’t perpendicular to the viewport. True stereoscopic vision means you don’t have to move the camera to get an understanding of form either. On top of all this- you can move, rotate and scale objects all at the same time, even as you move your view around.
Colour and form should be designed together
Good colour design requires you to balance different key colours, secondary colours and accents. If you have a model ready to texture and you haven’t decided how to balance these colours, you may find some areas of colour or material are bigger or smaller than you’d like, and it’s too late to change it easily.
By contrast- if you deal with colour and form at the same time you’ll get a much more immediate impression of how your design is going to look when it’s finished and textured. If you deal with this at the concept stage you have a lot more freedom to play with the design so that the hierarchy of shape and colour works as you’d like.
About two weeks ago I bought an Oculus Rift. I’ve been extremely excited for VR for a long time now and so far it hasn’t disappointed at all. The games are incredible, Google Earth in VR is incredible and the potential of VR for artists is incredible.
I’ve been using Oculus Medium for concept designing, inspired largely by Jama Jurabaev. Here’s the rough sculpt inside medium:Then a bit of tidying in Zbrush and off to be rendered in blender Cycles:
The end result tweaked and over-painted in Photoshop:
There’s definitely plenty of room for improvement with VR tools, but also incredible potential. The ability to simply reach out and touch a point in the air where you want something to be, or the fact you can use all the space around you rather than just a monitor screen are completely game changing.